Calligraphy Cursive Writing – Calligraphy is a method of visual art linked to writing. It is the designing and drawing/writing letters using a pen, ink brush, or other writing tools. The word calligraphy comes from 2 Greek words: Dallas, meaning beauty, and graphene, meaning writing. Although we consider calligraphy a form of writing, it is not used for general communication. Instead, calligraphy uses to create an aesthetic script. Therefore, its primary focus is design or artistic creativity, not readability or communication. You may have noticed calligraphy in invites, announcements, carved stone inscriptions, graphic design, typography, and font design.
Furthermore, we can classify calligraphy into three categories based on geographic distribution and linguistic families. Thus, these three categories are Western calligraphy, Eastern calligraphy,, and Islamic calligraphy. Western calligraphy is founded on Latin texts and includes a variety of subgenres. On the other hand, the East Asian people, Mainly in countries such as China, Japan, and Korea, use oriental calligraphy. In addition, Islamic calligraphy uses Arabic letters and is related to the Islamic religion.
Table of Contents
What is Cursive Writing?
Cursive writing is a kind of handwriting that uses a fluid style to speed up writing. In cursive writing, the letters are written out in full and are added to the words in a cursory manner without taking the pen off the paper. We refer to the types of letters we use for cursive writing as cursive letters. They are the opposite of capital letters. Cursive letters are loops and always link to each other. Here are some rules to track when writing a cursive letter.
- All similar letters must have the same height
- Writing should always be composed of a pattern of ovals and parallel lines.
- All lowercase letters must start from the top.
- Capitals must not exceed other letters
- All downstrokes of letters must be parallel.
Five Things to know Before Starting Calligraphy
It’s been almost a year meanwhile I started learning calligraphy. So here are five gears I wish someone had told me at the start.
1.Firstly, Learning calli is going to take a lot of practice. There is no way around it.
2. Don’t miss out on the basics of calligraphy.
3. Get the right lettering supplies.
4. Don’t get overwhelmed by Instagram – use it to your advantage.
5. Join with others as much as you can.
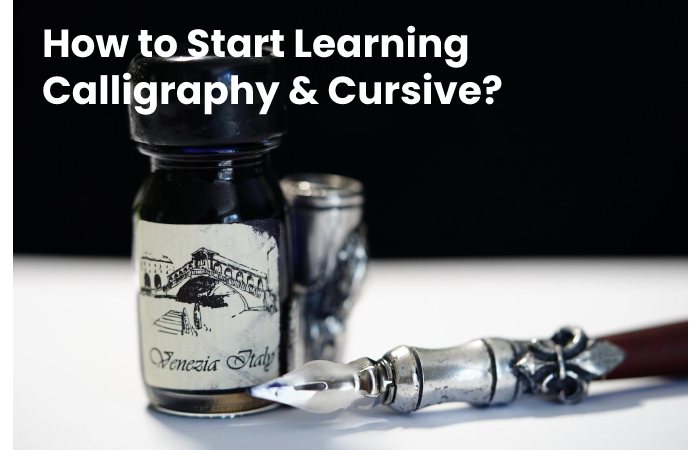
How to Start Learning Calligraphy & Cursive?
Step by step: start learning calligraphy
If you want to learn calligraphy, start with a regular pen or pencil.
Yes, you don’t need expensive supplies to start learning calligraphy.
Instead, you can start with these simple supplies:
- Pencil
- pen/marker/sketch pen
- paper (all)
- missing
- rules
This technique is called false (false) calligraphy. Simply put, any calligraphy is made using simple tools that look like authentic calligraphy.
Benefits of Learning Calligraphy
- Develops good handwriting in children
- improves their concentration
- It helps them become more artistic and creative
- It started as a hobby and can also generate compensation for certificate writing work.
- Increases their interest in learning more styles in the future
- Since it is a unique learning, the kids will stand out in their peer group
- It’s fun to write in various catchy types and attracts attention and garners praise.
Basics of Calligraphy & Cursive
- Elegant writing.
- We train for the age group of 7+.
- They’ll learn the trick.
- Depending on the stroke, the handwriting will be accompanied by different styles and fonts.
- We teach 12 fonts in basic calligraphy.
- He writes first with a pencil, then with a gel pen.
Advanced Calligraphy & Cursive
Advanced calligraphy is a creative art form in which patience and attention to detail are more important than artistry.
- You don’t have to be a sketcher to be good at calligraphy.
- This program is for students age seven years and above.
- Kids learn to write in different styles with calligraphy pens and different nib styles.
- For both courses, handwriting becomes more readable. In addition, it helps improve concentration
- by creating different artistic styles for project reports, greeting cards and certificates.
How to Follow Calligraphy & Cursive Guidelines?
Calligraphy rules are the behind-the-scenes stars of most fabulous pieces. However, since the guidelines do not appear in the finished works, we do not discuss them much. Today’s blog post will change that! Instead of letting the instructions be a vague background description, we’ll cover what they are, how to create them, and the shortcuts for using them.
What are the Calligraphy & Cursive Guidelines?
Calligraphy guidelines help you know where and how high your letters are. Procedures are usually drawn with a black lead or white pencil (on dark-color paper). Once you have used the guidelines for your calligraphic writing and the ink has dried, you erase the guidelines.
Calligraphy & Cursive – How Calligraphy Guides Work?
There are some steps for making calligraphy instructions. They:
1. Set the Ratio of the Height of Lowercase Letters to the Size of Uppercase Letters
For more formal font styles (like the Jeanette and Flourish shapes), you’ll want a uniform height for all your letters. Therefore, you will need three tags: a base tag, a middle tag (to represent the height of lowercase letters), and an upper tag (to describe the uppercase size).
For larger text, I usually create middle guidelines closer to the lower one than the upper one. It is because it makes my lowercase letters about 40% the size of uppercase letters. For short text, I place the middle guideline in the centre of the upper and lower guides. Note that the ratio of uppercase to lowercase letters depends on your personal preference. Thus, I encourage you to play with the indicative heights to see what you like best!
2. Evaluate your Available Space
Once you’ve determined how many guidelines you need, you’ll need to look at your project and decide how the procedures are. If you have a lot to type but don’t have a lot of space, you should create the instructions very close to each other.
3. Use a Ruler to Draw Directions at an Equal Distance
Once you have decided how far you need to stray from your guidelines, you also need to think about how many sets of approaches to create. For most envelopes, three groups are ideal. Use a ruler to create three sets of evenly spaced guides, and keep an equal distance between each set.
Therefore, Parallel gliders make it easy to create similar directions. If you find yourself drawing a lot of line guidelines, it would be worth investing in such a ruler!
4. Write and Erase
After writing the instructions, let the ink dry thoroughly, then erase the instructions. Try using a white eraser (such as Stadler Mars) for light-colored papers and a black eraser for dark-colored pieces.
Conclusion
Like many other letters, the cursive capital letter F also resembles its handwritten form. The lowercase f is the more difficult of the two. The capital letter F is similar to many other letters of the cursive alphabet and does not connect with its lowercase letters when forming a word. However, lowercase f does not connect when creating dishes.